After a long time agonising how I would route all of the cables from the roof to the cupboard under the stairs, I finally settled on the idea of a solar sub panel as used by AC Solar Warehouse Australia, and also shown in this Enphase Australia & New Zealand video
It took me a while to work out exactly what enclosure they were using, but it turns out it is a Legrand 36 module weatherproof enclosure.
The Enphase IQ Gateway Metered, is DIN rail mountable and fits perfectly on a 12 module section of DIN rail.
The Enphase Communications Kit 2 is also DIN rail mountable.
I have decided to have a double pole isolator in a 2 module enclosure near my DNO supply.
This will have 16mm meter tails into the Henley block, then 2 core 16mm SWA up to the solar sub panel.
I will run a separate 10mm earth connection, so I don’t need to rely on the steel armour for earth protection.
I will also need to run (extended) wires for the ‘Supply’ CT unit from the DNO supply up to the Enphase IQ Gateway Metered.
The ‘Solar Generation’ CT can sit inside the solar sub panel and have the 4 separate cores running through it (one for each ‘string’).
I may yet put a second ‘Harvi’ unit, if I can find another cheap one, in the solar sub panel to monitor the solar and battery feeds from a ‘MyEnergi’ point of view as well, although I should be able to pick everything up within Home Assistant, having a second ‘feed’ for verification never hurts.
The solar sub panel will have it’s own double pole isolator along with C curve RCBOs for each of the required circuits.
I can run all the other cables outside the house direct to the solar sub panel.
A wired ethernet cable will come from my loft based switch that already feeds a number of items on my roof.
Here is a graphical layout of the solar sub panel
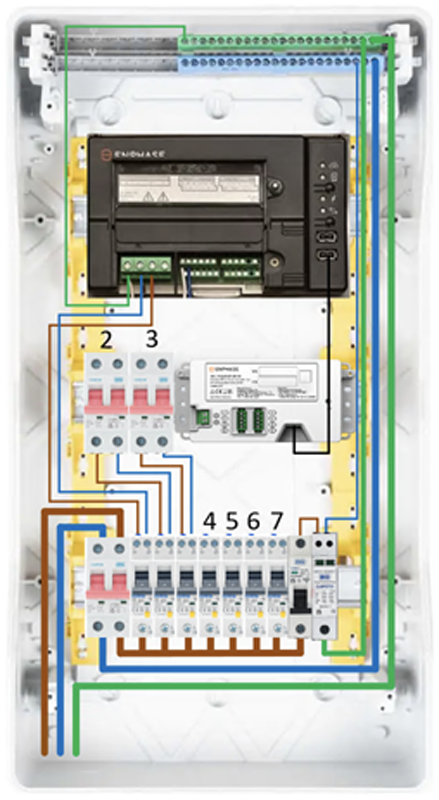
The bottom row of modules contains the following items (from left to right):
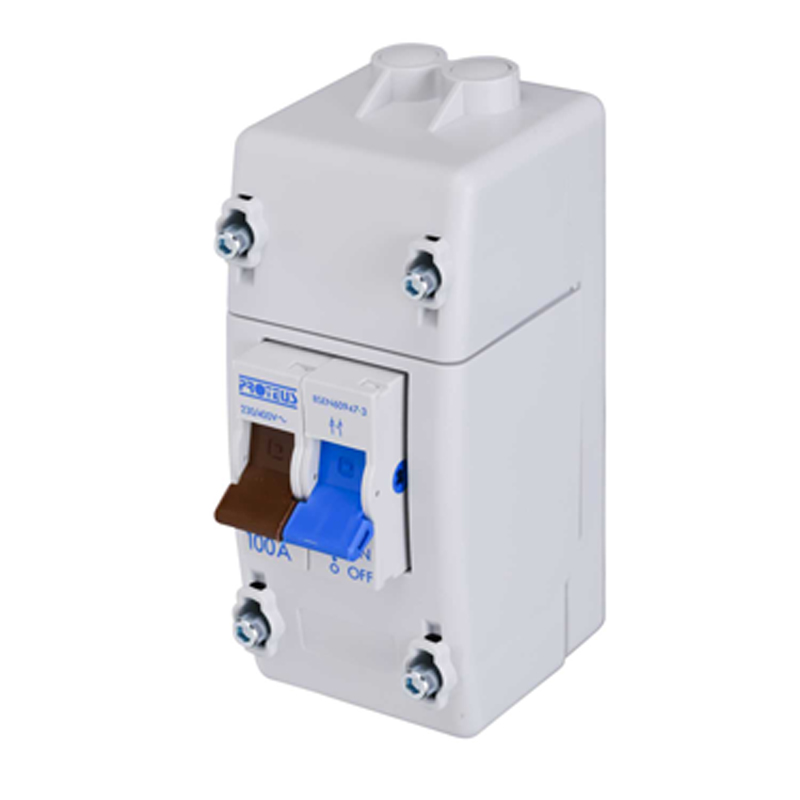
- 1 x 100A double pole isolator.
- 1 x 6A B Curve RCBO for the Enphase IQ Gateway Metered.
- 4 x 20A C curve RCBO’s, one for each ‘string’ of Enphase IQ8HC Microinverters.
- 2 x 40A C curve RCBO’s, one for each pair of Enphase IQ 5P batteries.
- 1 x 32A MCB (for the surge protector)
- 1 x 40KA surge protector
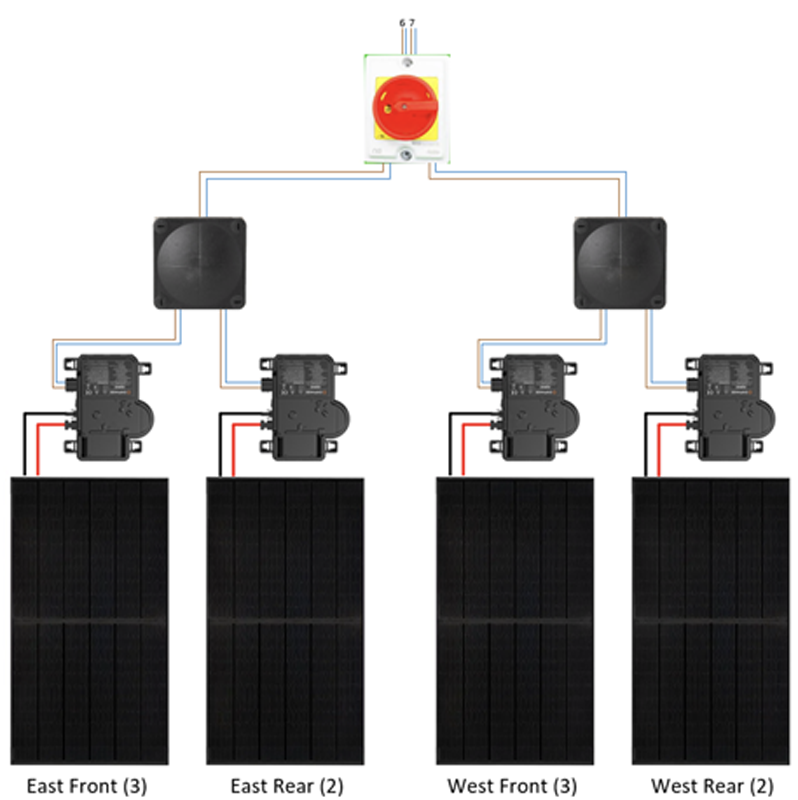
External wiring for panels and batteries showing RCBO numbers
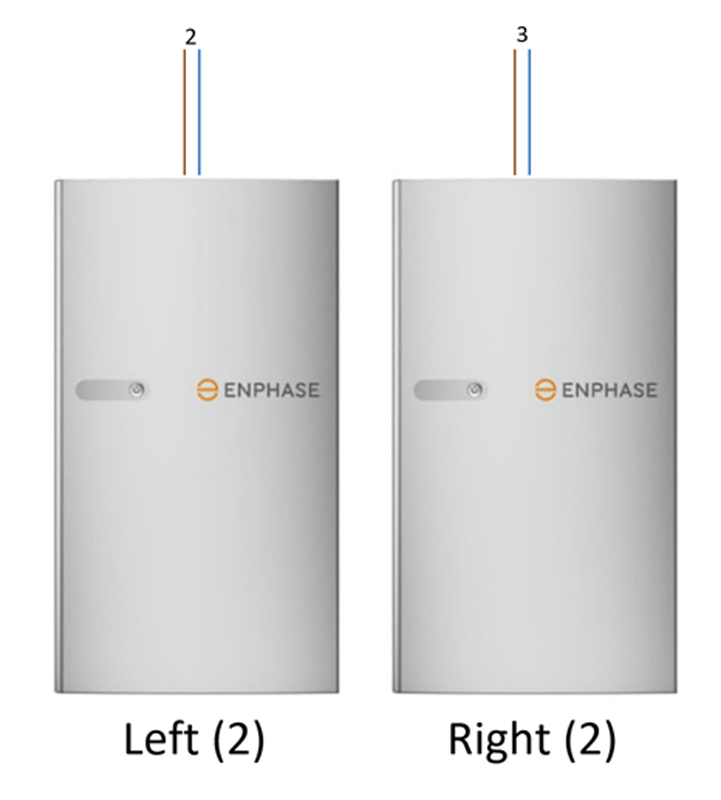

The batteries wire directly into the solar sub panel through rigid conduit and each pair has its own DIN rail mounted isolator.
The cables from the junction boxes to the 20A isolators are 2.5mm 2 core H07RF rubber cable, which is the same as that used on the Enphase IQ cable.
It is not advised to ‘tap’ from the end, but rather use the middle of a ‘string’ of micro inverters in order to minimise voltage rise.
This means twice as many IQ terminators will be required but I will also be less likely to overload the cable.
The isolators are all 4 pole, so I can keep the cores separate, connectivity from the rotary isolators to the solar sub panel will be via 4 core SWA, 4mm for the solar panels and 6mm for the batteries.
Comments are closed.