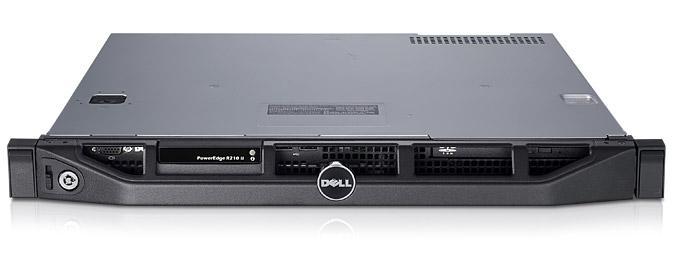
I decided that I wanted to have try some dedicated Virtual Machines (VMs) rather than Docker containers for some of my environments.
Most of these would not require much by way of CPU, RAM or disk space, so I thought a second hand Dell R210 ii server would be a good fit.
The server is just over 400mm deep and can be mounted in a 2 or a 4 post rack.
I ordered mine from Ebay seller easy.t3ch with a Pentium G620, 32GB RAM, iDRAC Enterprise, 146GB HDD and H200 Hardware Raid card for £159.99 including P&P.
This was the cheapest configuration I could make with 32GB of memory, whilst I am not really interested in the hard disk or the CPU, the price quoted without these was only £10.00 cheaper, and his price with an Intel Xeon E3-1230 V2 CPU was £54.00 more.
I purcased a second hand Intel Xeon E3-1280 CPU for £47.76 and a new rack mount kit for £38.40 both from Ebay, both prices include P&P.
I am still awaiting the arrival of the CPU and rack mount kit, but did not want these to hold me back with getting started.
The server came with both of the drive caddies and 15 of the 16 screws for mounting disks, it also came with a 4 way SAS splitter cable connected to the H200 controller.
I removed the 146GB disk and installed 4 x 300GB 10K rpm SAS drives in the cages, these were liberated from some servers we decomissioned at work a few years back.
Next up I connected my laptop to the iDRAC interface and configured a manual IP of 192.168.0.100 and connected to the default IP of 192.168.0.120 for the iDRAC via a web browser and logged in with the default user of ‘root’ and default password of ‘calvin’.
From here I was able to change the interface to DHCP, apply and then connect from my desktop.
Next issue was upgrading the iDRAC firmware to something a bit more current – it was running version 1.98 that was released on 09/10/2014, I applied the following upgrades, although I am sure I could have skipped a couple of steps:
1.99 from 25/06/2015, 2.80 from 30/11/2015 and finally 2.92 from 31/01/2019.
Most of the upgrade procedures tell you to upgrade from the running OS, however I don’t have one of those yet, so I upgraded direct from the iDRAC itself (iDRAC settings -> Update) and upload the firmware file.
Initially I was having issues with the uploaded file not being recognised, then I discovered that the exe firmware files were self extracting archives and the file I actually needed was called firming.d6 from inside this archive.
If anything goes wrong with the firmware upgrade from the OS or from the iDRAC itself, you can always roll back to the previous firmware version as this is also kept in case of emergencies.
I had the same java issues as I had with the pfSense Install, somehow the latest set of Mac OS updates had stripped out the Java console again!
I then updated the LC_Repair_Package to version 1.7.5 and rebooted the iDRAC.
In order to access the Unified System Controller (USC) I needed to press F10 (fn + F10 on my Mac).
Unfortunately the ftp site used for the software updates, while still present, no longer holds updates, as these are now supposed to be installed via https, which is not an option on my version of USC! (oh the joys of using legacy hardware).
So next attempt was to create a DOS bootable USB drive with the firmware on it – easier said than done with a Mac.
I tried numerous different tools and images before finally stumbling across something that actually worked.
I downloaded a ready built FreeDOS image from Honneypot.Net, and followed his instructions for identifying the USB drive and uploading the image to it.
Next job was to persuade the Dell R210 ii to boot off the USB drive, this involved accessing the BIOS boot menu (F11) and selecting the legacy HDD option and then putting the USB drive at the top of the list.
I also disabled the annoying PXE boot by changing the associated NIC interface to Enabled, rather than Enabled with PXE under the System Settings (F2).
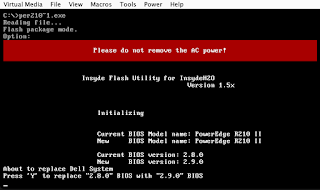
I was now finally able to run the firmware upgrade.
Firmware successfully updated.
Another item I updated was the auto boot after power failure under System Settings (F2) which I set to a User defined value of 30 seconds after power restore.


