Saturday 13th August
First job of the day was to swap out a couple of sockets in the loft bedroom for USB 2 gang sockets.
Half of the items we plug-in in that room are USB powered, so this saves a couple of plug points from wallwart transformers.
I like MK series sockets and switches so that they all match.
I decided to test the new wiring and connect it up to the consumer unit today.
Earth loop impedance tests were all good, as were the insulation resistance tests, so good to go with connecting up.
Once live I tested each of the sockets to ensure they were wired correctly with a loop PSC tester.
All good, so fuse back in the spur and try out the under cabinet lights.
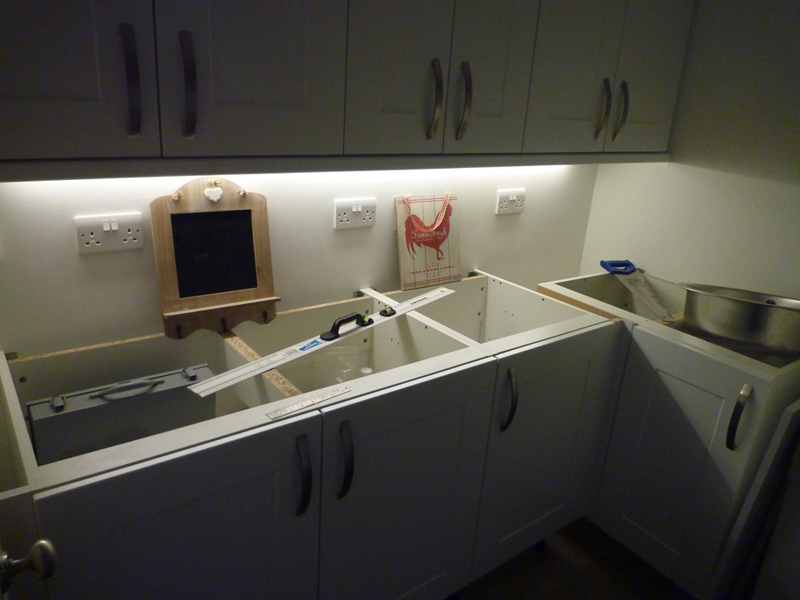
The lighting circuits kept me busy for a bit longer since despite all the tests being good, every time I switched on a light the RCD tripped.
After several hours of continuity testing on cables, disconnecting and re-connecting ables, swapping out switches, I eventually realise that I had the neutral connected to the wrong half of the split supply consumer unit.
Once that issue was resolved the lighting all worked as expected.
Utility room LED ceiling lights

Cinema room remote dimable ceiling lights.

At this point I decided to call it quits for the day.
Sunday 21st August
First job today was to swap out a socket in each of the children’s bedrooms for a USB capable socket.
When I re-screeded the floor by the radiator, it would seem that one of the pipes dropped slightly, such that it no longer lines up with the radiator.
To solve this issue, I dropped the height of the radiator such that it lines up with the lowest fitting.
I then cut off the olive on the longer pipe before reducing the length of the pipe on this side to match.
With the radiator connected up, back on with the water only to discover when I opened the valves on the radiator that the inlet fitting on the radiator itself leaks.
Tightening the fitting does not help as it seems to be pushing through into the radiator and just making the issue worse.
Older radiator fittings used a tapered thread and so rarely had this issue, parallel threads need to butt up against something to seal correctly.
I tried covering the threads with silicone sealant and letting it cure, but several hours later it still weeps – this I fear will be an on-going saga to resolve it properly.
Next job was to seal around the edges of the window cill with silicone sealant.
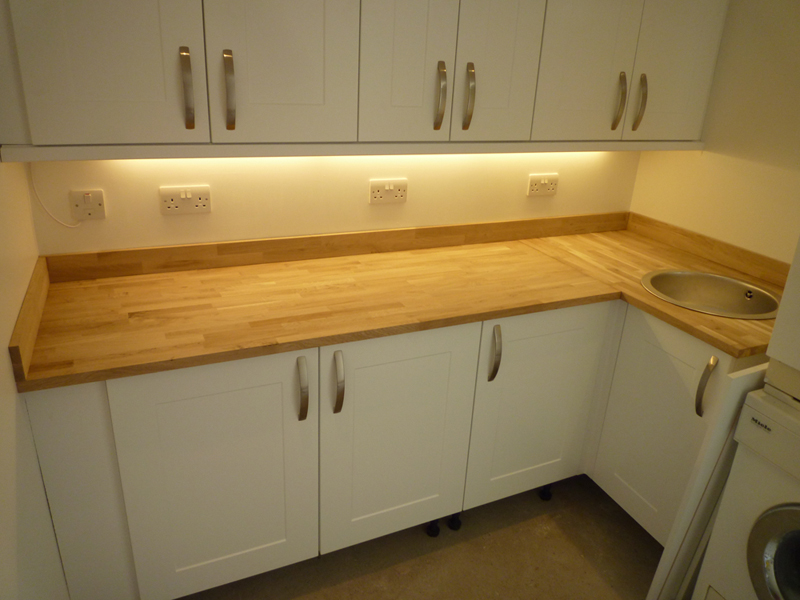
The Oak worktop arrived on Thursday from Worktop Express, along with a fitting kit, care kit and upstands.
Neither of the ‘corners’ in this room are 90 degrees, so some fun to be had here, and with just a single 3m length of worktop, no margin for error.
First cut was for the short piece over the sink cupboard, this was close, but not quite right, the back corner was still about 10mm from the wall.
Cut a sliver off the end to rectify this issue and that piece fits perfectly.
Took the long offcut and offered it up to the other corner and likewise I needed to cut about 8mm from one end to make it fit.
Placed the short piece on top of the longer piece, packed up with offcuts, to mark where to cut the joint.
Right first time and a good tight fit – I must say that I would not even have attempted this if I did not already own a tracksaw.

Marked out and cut the hole for the sink with a jigsaw.
I removed the cross brace in the sink cupboard as I would otherwise have to cut most of it anyway.
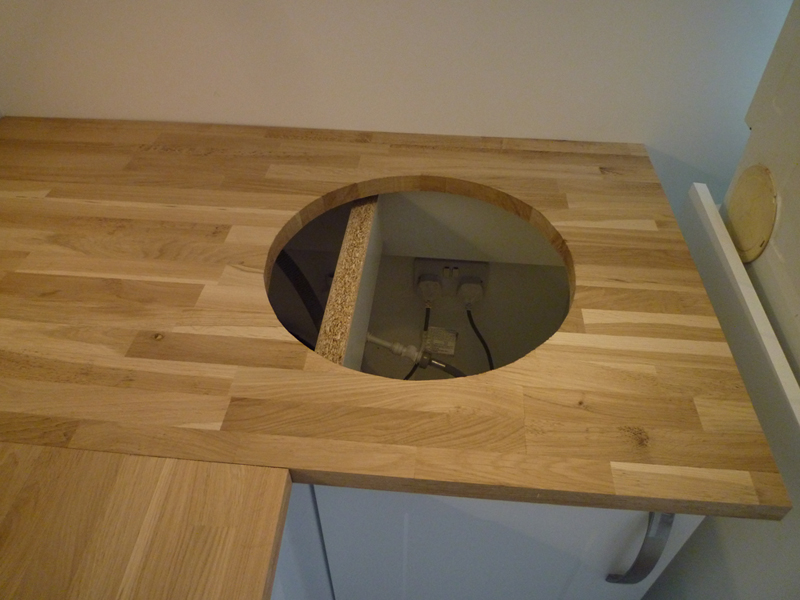
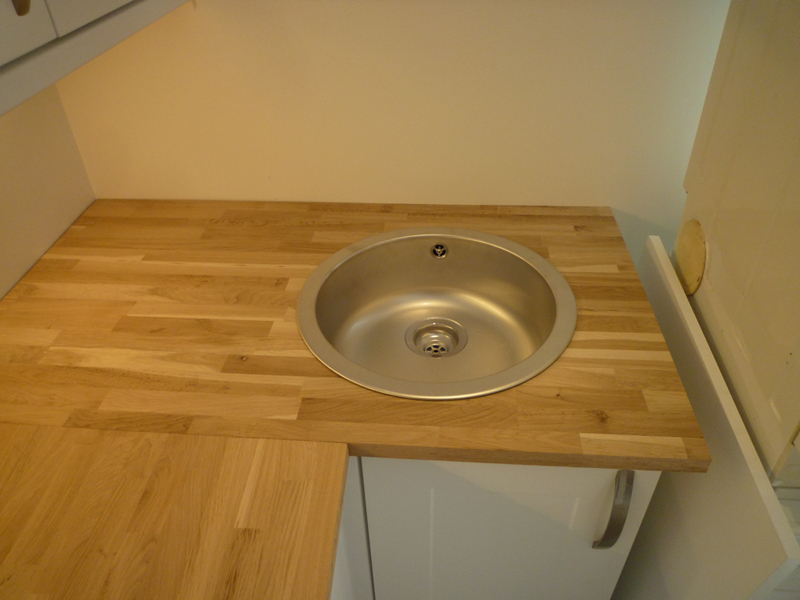
Trail fit of the sink – all looks good so far.
Out with the worktop jig and the router to cut the slots for the worktop connector bolts
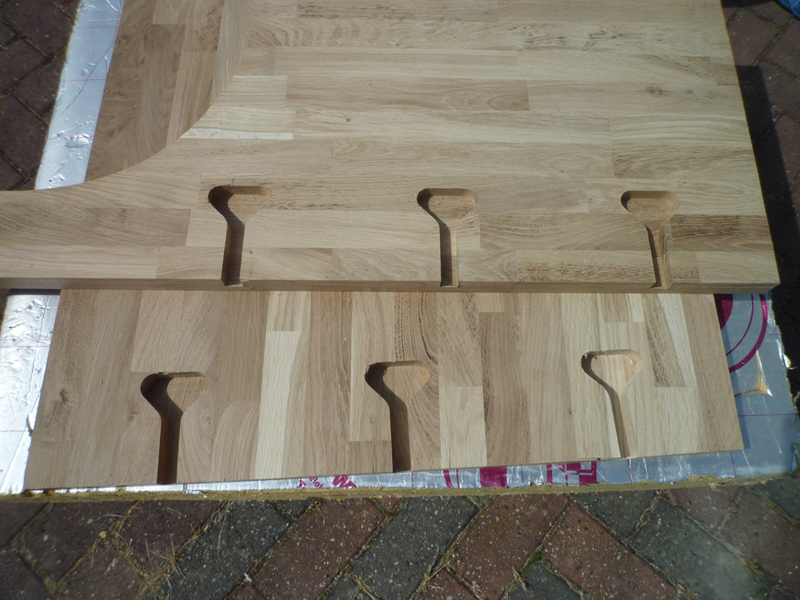
I also needed to cut part of the cabinet front to give access to one of the bolts.
Applied some glue to the edge of the join and tightened up the bolts.

Cut the upstands to length and secured them in place with mastic.
Decided to stop there as by the time I had tidied up I had completely run out of energy.