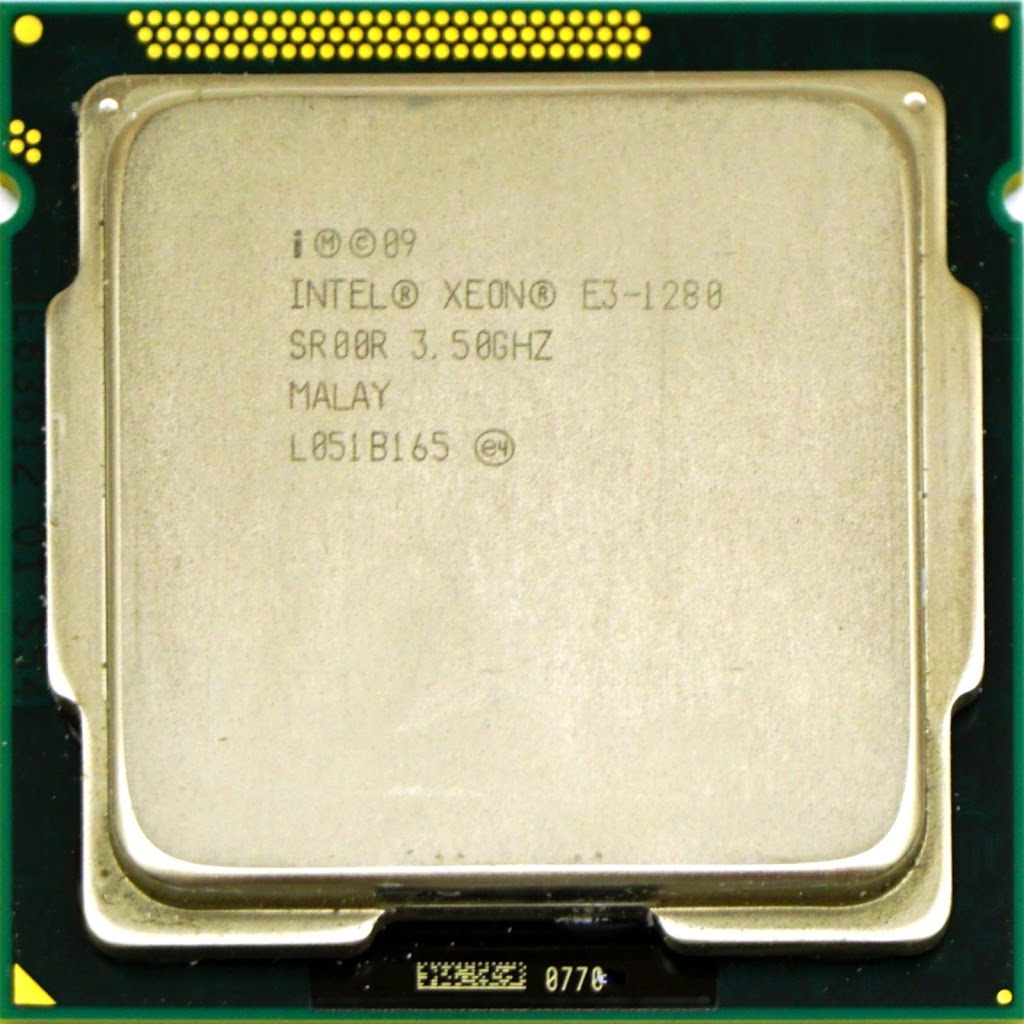
As mentioned previously, I ordered my Dell R210 ii with a Pentium G620, the replacement Intel Xeon E3-1280 arrived from China after only 13 days.
The swap-out was pretty straightforward, the seller a-zada had included a small pack of thermal paste which saved me from searching for some.
Three of the four SDSA5AK 64GB half slim SSDs from CEX had also arrived, but the sata power cable was still making its way to me from China, so I could not install them all yet.
I disconnected 2 of the 300GB SAS drives and installed the 64GB SSDs in their place.
I was able to install XCP-NG on a software Raid 1 configuration of the two 64GB SSDs, however the new install did not show in the BIOS boot (F11 or fn + F11) as an option.
After closer inspection of how the Raid 1 setup had been done, I was also not mad on the implementation.
What it had done was to create a mdadm device, md127, using the entire disk for each of the 64GB SSDs and then create a number of partitions on this meta device.
What I wanted was partitioned disks where each partition was mirrored between the disks.
I then struggled to remove the md127 device as the XCP-NG installer did not have an option to remove it.
Even after removing all of the partitions and writing zeros over the various disks, it still would not go!
Eventually I installed Ubuntu over the top of one of the disks and this finally removed it, although I still could not persuade the server to boot from or even list the 64GB disk.
I started looking at a possible firmware upgrade for the Dell PERC H200 card, however I found that it was already at the latest version.
While looking at the Dell PERC H200 controller configuration, (Ctrl-C on startup) I noticed there was an option for selectcing a boot device (alt + b or option + b).
Selecting the first 64GB SSD finally caused the disk to show in the BIOS boot (F11 or fn + F11) and the server would now finally boot from this device.
Unfortunately, my intentions for software mirroring were doomed to failure because of how XCP-NG partitions up the disk and what the partitions are used for.
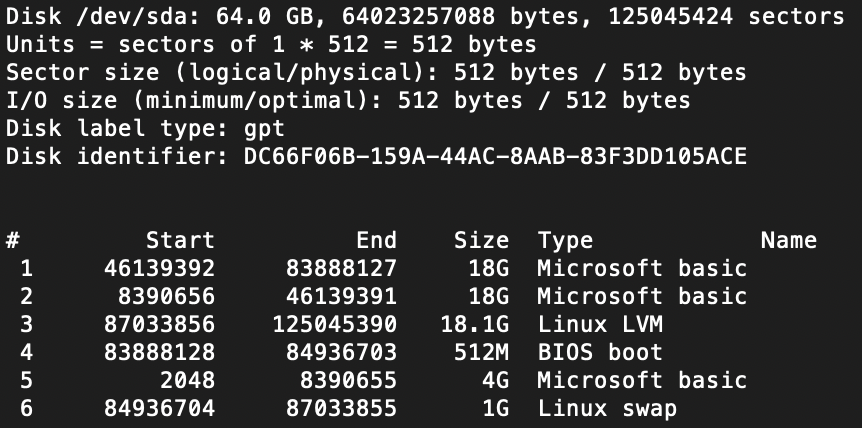
Partition 1 is the / file system for the OS, partition 2 is a backup partition used when upgrading, partition 4 is the BIOS boot area, partition 5 is used for /var/log, partition 6 is used for swap and partition 3 is all the remaining space on the disk.
Whist it would be possible to create metadevices for each of these, there is no guarantee that XCP-NG would know how to use them in the event of an upgrade.
I have also chosen to ignore hardware Raid using the Dell PERC H200 as several people have proven more IOPS against software Raid and SSDs than the same disks Raid 1 using one of these older controllers.
Setting up the zpools, I will add the other disks later once the sata power cable arrives.
Install and enable zfs (yum install -y zfs; modprobe zfs)
Obtain device by-id names for the disks (ls -l /dev/disk/by-id) Linux has a tendency to rename /dev/sdX disks on a reboot which in turn plays havoc with zpools.
I created a mirrored zpool on the two 300GB SAS drives (zpool create datapool mirror /dev/disk/by-id/wwn-0x5000c5001d33cd03 /dev/disk/by-id/wwn-0x5000c5001d7efdbb)
Obtain Server UUID (source /etc/xensource-inventory; echo $INSTALLATION_UUID)
1611c0a7-86a6-47cf-aa60-4bf70045f3ab is returned for me
Register the new zpool as an SR (xe sr-create host-uuid=1611c0a7-86a6-47cf-aa60-4bf70045f3ab name-label=”Local ZFS Data Pool” type=file device-config:location=/datapool)
9d72e07e-9b1a-5d82-348a-2364f32725bc is returned as the new UUID.
Next I wanted to replace the 18GB EXT3 LVM based SR ‘Local Storage’ with a ZFS one (this is the default SR created at install time using the remainder of the OS disk).
Obtain the SR uuid (xe sr-list)

e893db52-7db4-13c5-694d-098530a3a10d in this case
Obtain the PBD associated with this SR (xe pbd-list sr-uuid=e893db52-7db4-13c5-694d-098530a3a10d)

66e109a3-7c77-0d37-9daa-21bdeca8309b in this case
Unplug the SR from the PBD (xe pbd-unplug uuid=66e109a3-7c77-0d37-9daa-21bdeca8309b)
Forget the SR (xe sr-forget uuid=e893db52-7db4-13c5-694d-098530a3a10d)
Next remove the LVM devices, these can be found by running lvs, vgs and pvs for Logical Volumes, Volume Groups and Physical Volumes respectively
Remove the Logical Volume (lvremove e893db52-7db4-13c5-694d-098530a3a10d)
Remove the Volume Group (vgremove XSLocalEXT-e893db52-7db4-13c5-694d-098530a3a10d)
Remove the Physical Volume (pvremove /dev/md127p3)
Create new zpool (zpool create ospool /dev/md127p3)
Register the new zpool as an SR (xe sr-create host-uuid=1611c0a7-86a6-47cf-aa60-4bf70045f3ab name-label=”Local ZFS OS Pool” type=file device-config:location=/ospool)
579fd444-406d-1a16-17e6-6c14d1029556 is returned as the new UUID.
Set this SR as the default one to use (xe pool-param-set uuid=1c433a1b-e16f-cf93-1f84-457c87e6fdf5 default-SR=579fd444-406d-1a16-17e6-6c14d1029556)
The uuid in the above command auto-completes.
I also turned on deduplication for the ospool as the OS installs should deduplicate well (zfs set dedup=on ospool)
Deduplication is not usually advised as it can have a negative impact on memory (see this article) however I am hoping the benefit will outweigh the cost in my use case.
I also enabled compression for the ospool (zfs set compression=lz4 ospool) and the datapool (zfs set compression=lz4 datapool).
Next I installed the xo-appliance from ronivay’s GitHub (bash -c “$(curl -s https://raw.githubusercontent.com/ronivay/XenOrchestraInstallerUpdater/master/xo-appliance.sh)”)
Taking note of the IP address for the web interface, as well as the user names/passwords.
I have had issues with the xo-appliance not starting at server reboot, so these next steps should ensure it boots automatically.
Obtain UUID of XenServer pool (xe pool-list)
1c433a1b-e16f-cf93-1f84-457c87e6fdf5 for my pool
Set XenServer to allow VMs to autoboot (xe pool-param-set uuid=1c433a1b-e16f-cf93-1f84-457c87e6fdf5 other-config:auto_poweron=true)
Obtain UUID of the xo-appliance VM (xe vm-list)
4292f365-f86d-40c3-c76d-553ce133dc10 for my VM
Set xo-appliance to auto boot (xe vm-param-set uuid=4292f365-f86d-40c3-c76d-553ce133dc10 other-config:auto_poweron=true)
Connect to the Web interface of the appliance, add the new server (remember to allow self signed certificates).