
Because I am trying out the Delrin profile slider from Motedis, I don’t really have any choice other than to design my own carriage.
I used ideas and dimensions from a couple of other carriages on Thingiverse, but that is about where the similarity ends, my carriages were designed from the ground up to work with my sliders.
Here is the final version of the model I designed in Sketchup:
The idea is that the belt is retained all the way around the toothed fixture, that combined with tight slots for the belts should mean that it is unlikely that the belts will pull out.
The holes in the ends are for magnets that I will use with hall effect sensors as limit sensors, just like I use on my Prusa I3.
The carriages took 10397.1mm (25cm3) of filament each for a combined cost of £1.17 for 3.
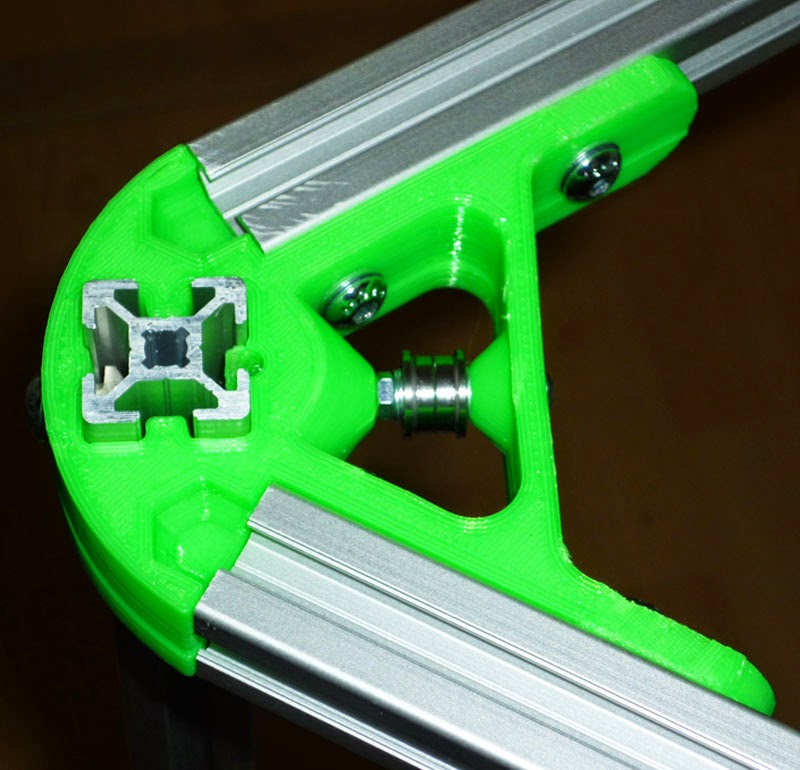
Here are the 3 printed carriages ready to be attached to their sliders:

The original holes in the sliders are about 2.5mm, so I drilled them out to 3.2mm and tapped them M4.
I then attached the carriages to the sliders with 3 x M4x20mm socket head cap screws.
I decided to remove the anti-vibtarion mounts from the stepper motors and also attach them with 4 rather than 2 x M3x8mm button head cap screws.
Previously I had been unable to tighten the motor screws as there was not enough space for an allen key to fit, even a ball end allen key was at too much of an angle to connect properly.
So I decided to modify one of my spare 2mm allen keys I had received for free with something or other.
Initially I thought I would cut it down with a hacksaw, but this would not even mark the hardened allen hey. Heavy duty wire cutters just about made an indentation.
In the end I ground down the short arm on my bench grinder to about half of its original length whilst holding the allen key in a pair of mole grips to protect my fingers.
The motor screws could now be tightened to a satisfactory level and were more likely to line up with the top pulley.
I assembled the top pulley from 2 x 623 flanged bearings (£4.59 ($7.00) for 10 inc P&P from Ebay seller link-fortune), suitably spaced with M3 washers and an M3 nut.
And then attached the belts to the carriages
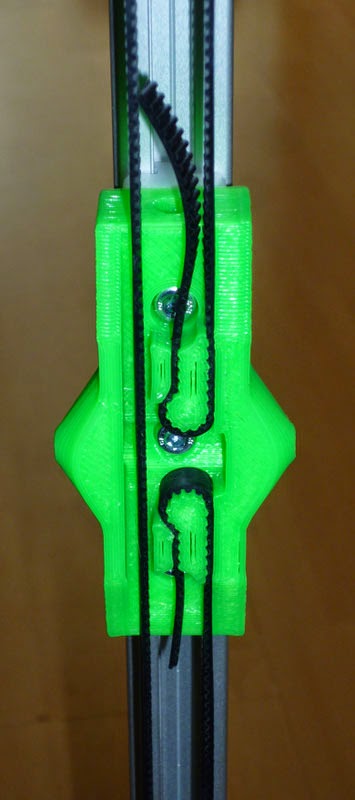
I will trim the top piece of belt once I am satisfied with the tension.
I fitted the M3x30mm tensioning screws with some M3x12mm penny washers to the top of the frame.
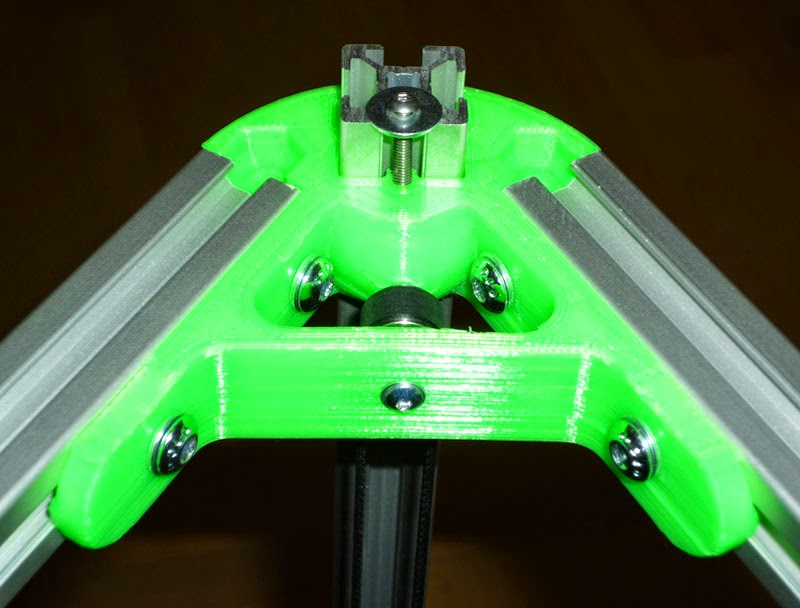
After suitably tensioning the belts, I tested moving the carriages up and down the 20x20mm profile by hand.
At this point I discovered that something was very wrong with one of the motors, I was feeling some very pronounced ‘cogging’ and on closer inspection discovered that the shaft for this motor was in fact bent!
I swapped it out for another motor and all is now fine.
I suppose I can’t complain too much, the motors are used and 5 of them cost me $30.00 (£20.00) + $20.00 (£13.00) P&P, admittedly prices have come down recently – 40mm Nema 17 steppers can be had for $6.80 (£4.38) from Robotdigg.
There is a small amount of sideways rotational movement possible on the sliders, I have yet to determine if this is going to be an issue once the arms have been assembled.
I was about to assemble the effector arms, but thought I would check they were all the same length first.
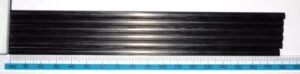
I was a bit disappointed to find such a variety of lengths ranging from 178mm to 182mm, when they were all supposed to be 180mm.
I have complained to Derek at Robotdigg about this poor level of quality control, +/- 2mm or 10% is a bit much in my opinion, there is 4mm (20%) difference between the longest and shortest of my tubes.
To be fair, if I ignore the shortest one, the others are all 180mm or over and could all become 180mm with very little effort, however lengthening a carbon fibre tube is less straight forward.
Hey, I dig your kossel. I'm taking it as reference to build my own.
I'm also using the sliders from motedis. Could you share your design adaptation for the sliders? And maybe the end effectors too?
That would be awesome!
Sam
I'm also very interested in this. Could you please share the slider carriage?
Thank you for your interest, I have now published this design on Thingiverse http://www.thingiverse.com/thing:1205191
I am currently not comfortable with my end effectors – they are not particularly strong and two have already split, so I will probably redesign this item.
Great, thank you