One of the things I have never been too happy about with the Prusa i3 design is the lack of ability to properly tension the X axis.
The best one can usually achieve is to pull on the belt and try to keep that tension whilst jamming the belt into the back of the X carriage, then tie off the ends with a cable tie in the hope that they did not move.

Unfortunately this does not make for a particularly tight belt and there is no means of adding small increments to the level of tightness.
I believe the lack of tension is one of the things that is leading to my missed X steps, so I went looking for a suitable solution.
First try was this thing, that added an additional bearing to tension the belt.


I printed this and assembled, however in a very short space of time ( a couple of hours), the U shaped piece snapped along the base of the U where the most stress is applied and rendered the part useless.
Next I thought I would try this thing, the main issue I had with this one was actually printing it, the top surface simply did not want to attach to the supports and left me with a mess.

I am also not convinced that it is physically strong enough, and would probably snap on the end of the axle pretty fast.
I also started to notice that the right hand Z rod seemed to have a bow in it probably as a result of repeated attempts to tension the X axis.
The Prusa i3 design is found lacking in this area as well, since the right hand Z carriage is not actually secured to the rods, it simply stays in place due to friction.
This second solution would potentially just make this bowing situation worse, so I ditched this design as well.
Next up is a variation on this thing where the tension for the X axis is supplied by pressing on the ends of the X rods.

This seemed like a much more viable solution, so I decided to draw create some suitable items myself in Sketchup.
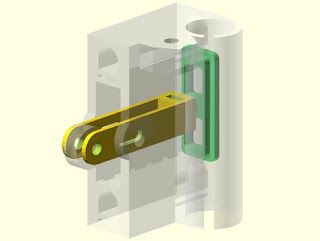
Here is the tension bracket. This simply fits over the ends of the rods and provides a surface to tension against.

The other item is a bracket to hold the bearing and tension the belt.

These two items complement the existing left Z bracket

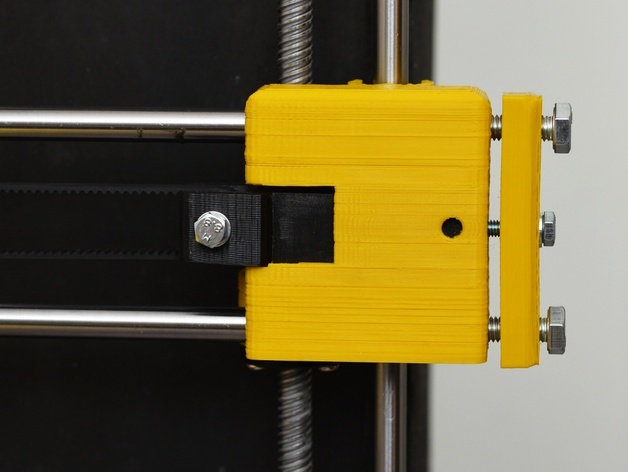
After pulling the printer apart and fitting the newly printed part I re-leveled the X axis and tensioned the X belt and tried again. The result was still not perfect, but it was a lot better and the left Z rod is no longer bowing.

The top one is the first print, the bottom one after the upgrade, believe it or not, they are both the same way up with the first layer nearest the bottom of the photo.
Even with the newer second printed tensioner and a lot more tension on the belt, the next print still skipped by about .5mm after 3 layers, so belt tension is not the cause of my X axis skipping, time to look elsewhere, maybe reducing the jerk some more will help.