Another area I have been working on is the wiring diagram for the laser cutter.
This I have been drawing up in Microsoft Visio. Since I have a Mac, and there is no version of Visio for Mac, I make use of a Windows 10 virtual machine that I run under VirtualBox. I obtained genuine license keys for Windows 10 and also for Visio via auctions on eBay, paying £1.47 for the Windows 10 license and £2.99 for Visio. I also make use of this Windows 10 host for any other products that will only run under Windows such as LaserCad and our Archery club’s record keeping software.
This is the main wiring diagram.
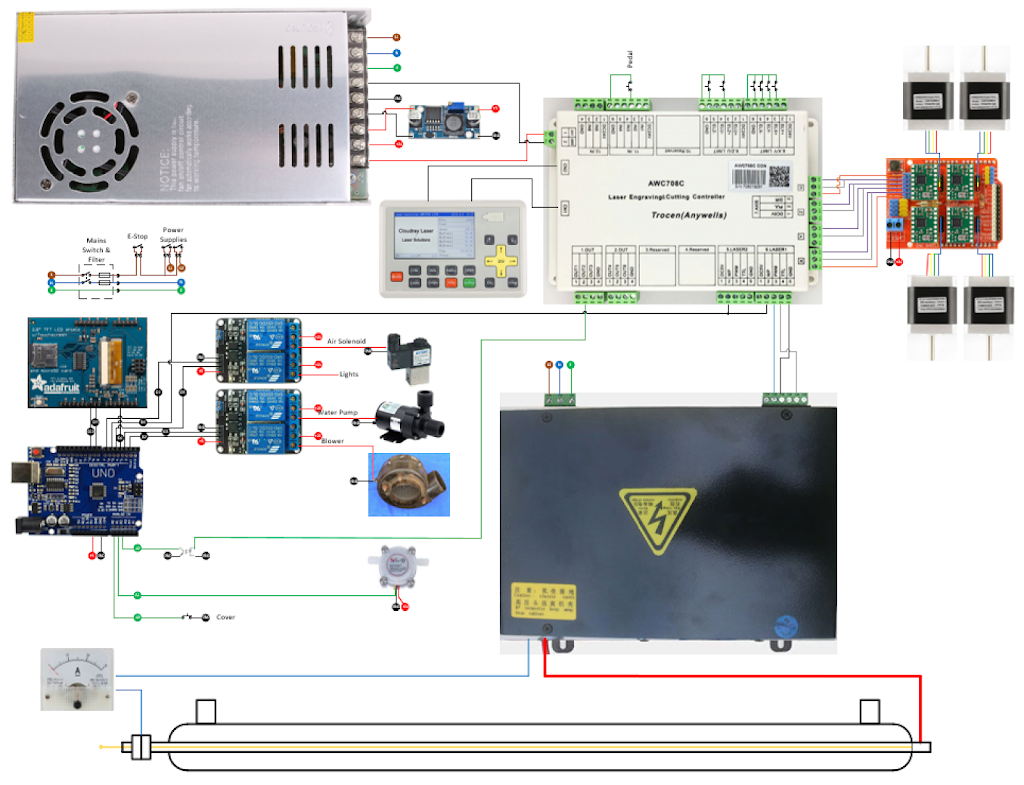
The incoming power first goes through the Emergency Stop switch and then through a three position progressive switch to L1 (24V PSU) and L2 (Laser PSU).
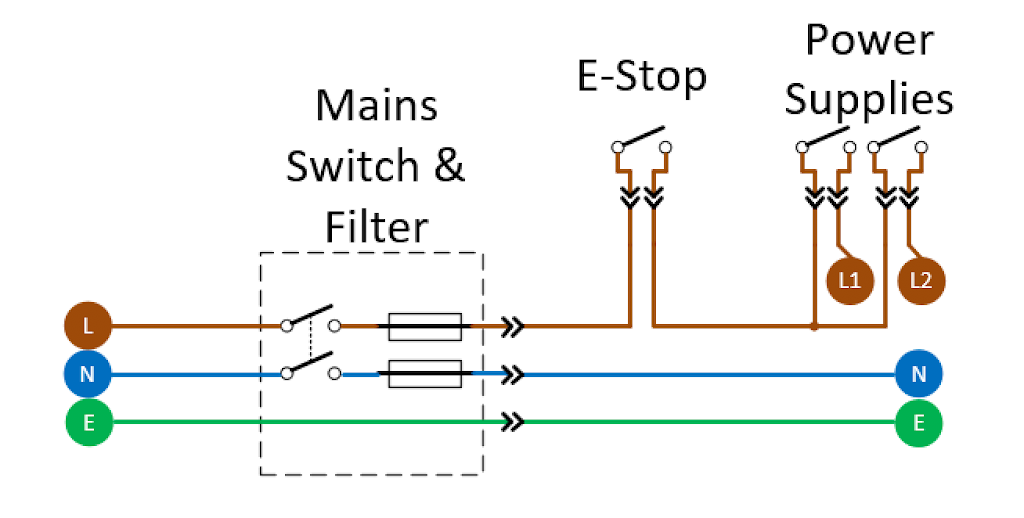
The 5V power is provided via a DC-DC Buck converter stepping down the 24V to 5V.
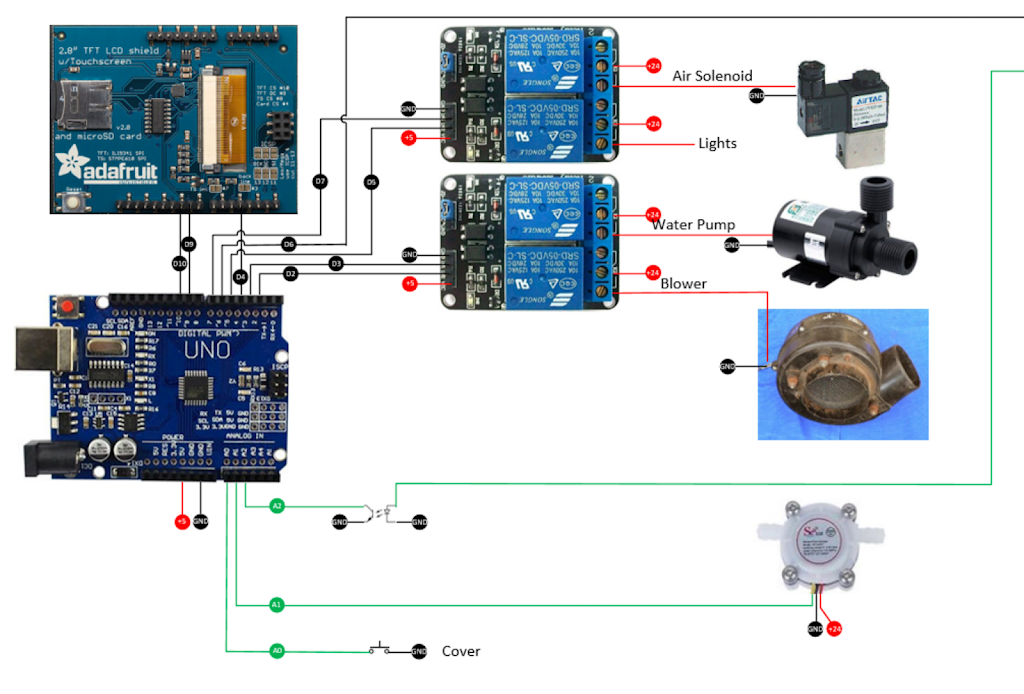
The Arduino and all associated connections are either powered via 5V from the buck converter, or 24V via relays from the 24V PSU.
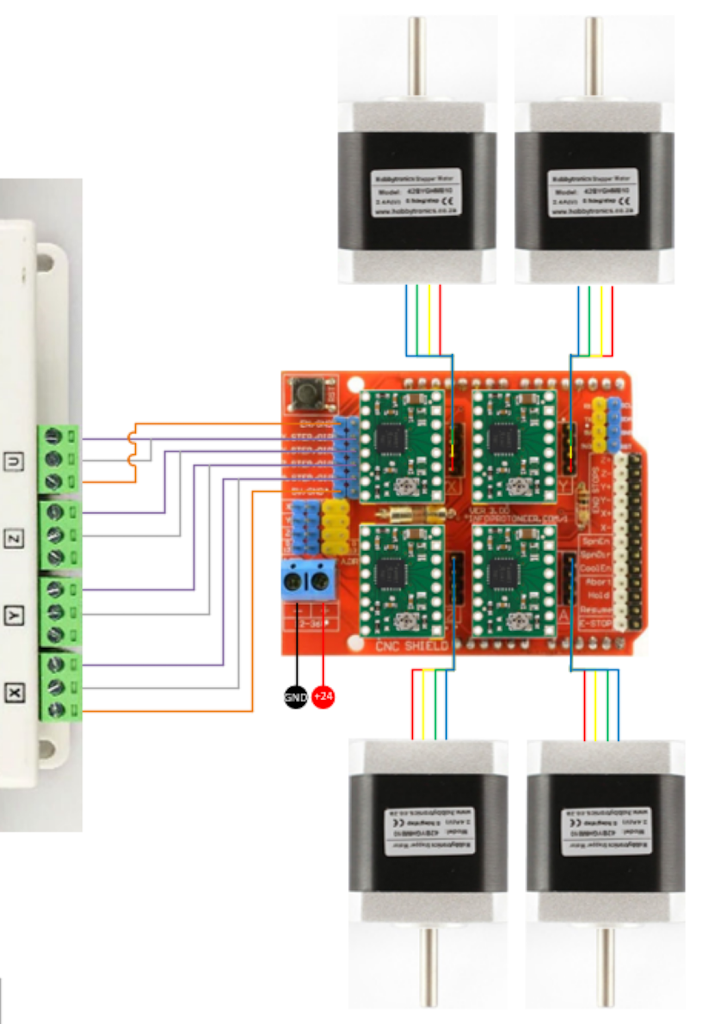
The stepper motors are controlled via A4988 stepper drivers on the Protoneer CNC shield which in turn are driven from the AWC807C Lite DSP controller