OK, I will admit that some of my earlier designs were not exactly robust, and probably attempting to run before I could even crawl :o)
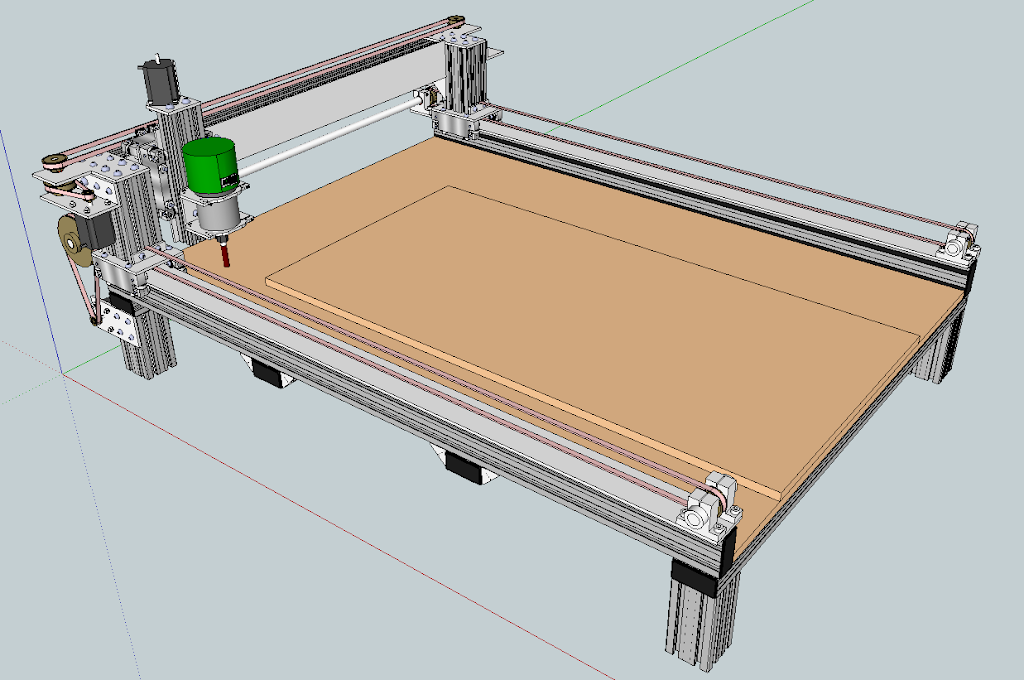
With that in mind, I have scaled back my current design to about a 1×1 metre cutting area.
The design is also all profile extrusion – no Unistrut this time.
I have also been experimenting some more with belt drives as I still feel there is the potential for fast rapids, although it will remain to be seen if this is at the expense of rigidity whilst cutting.
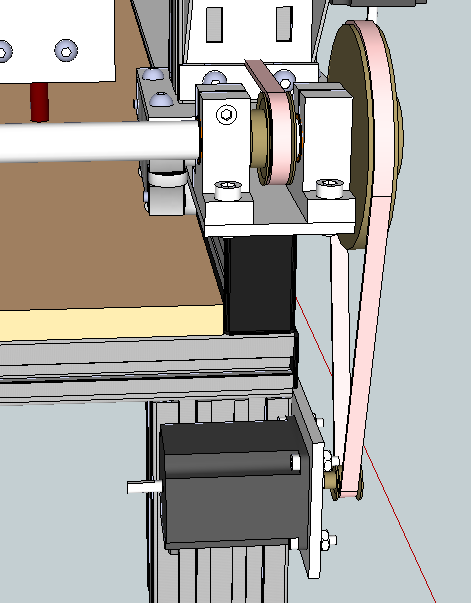
I am still not entirely happy with the attachment of the belt to the carriage for the X axis, but it is the best idea I have come up with so far – The angle plate allows the two ends of the belt to pass through and be tensioned by an additional plate that slots into a hole in the angle bracket and then bolts tight at the top.
The axle here is 12mm this time using flanged Oilite bearings and 12mm shaft collars.
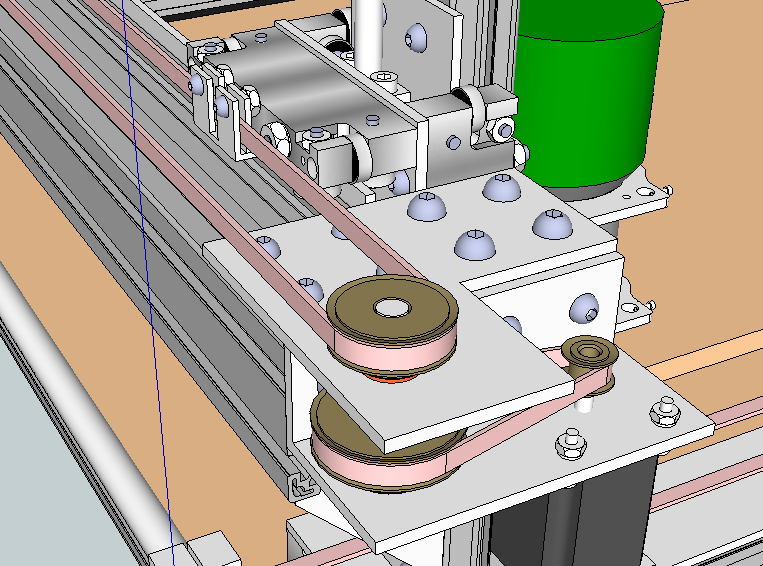
All the belts and pulleys are for Imperial XL (0.200″ or 5.08mm) pitch 3/8″ (9.53mm) belt, mainly because of cost and size, the XL pitch items seem to be a fair bit cheaper than the Metric T5 pitch equivalents, especially for a 72 tooth pulley.
It makes little difference, Metric or Imperial for the belts and pulleys compared to the rest of the machine, all you are really after is the gear ratios to meet your requirements at a price point you are happy with, all the pulleys are pilot bore, so you drill them to your required axle size and then just buy belts of a suitable length to match your motor positions, which in my case are adjustable, so that they can be tensioned.
Open belting, you simply tension at the ends where they are fixed to the axis.
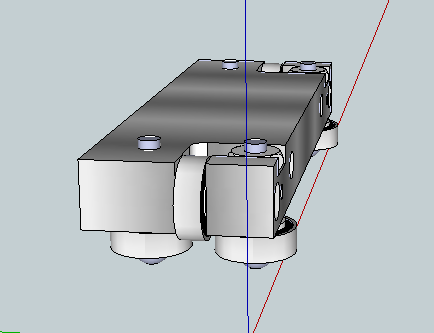
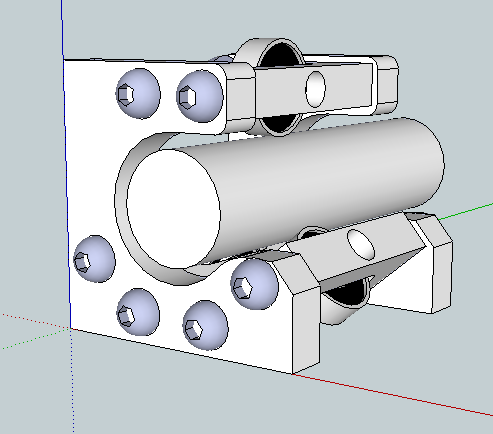
I really like the Skate-o-Rail idea designed by la coterie:
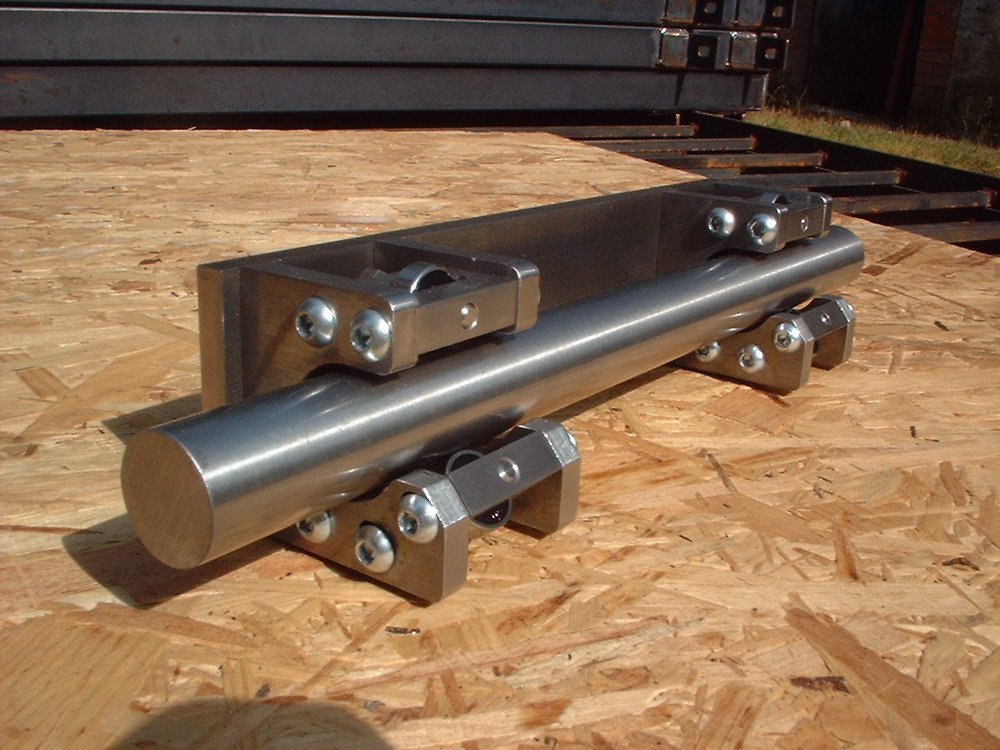
This in turn is based on a design by MrBean also shown on the cnczone forum.
After modelling both the side mounting and the top mounting designs in Sketchup:

I attempted to modify my 1mx1m Router design to make use of them – first with the side mount variant:
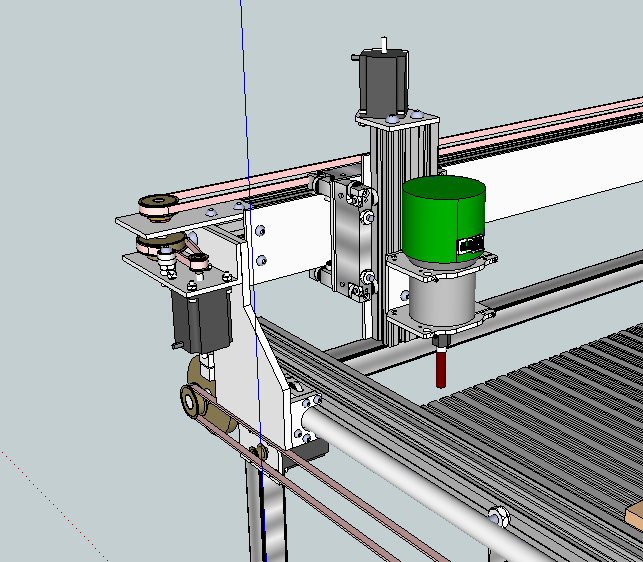
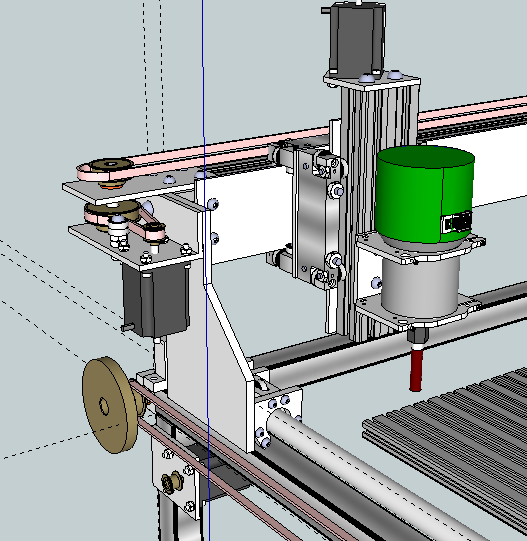
However, I was really struggling with suitable mounting points for the belt drive, and not convinced about the overall rigidity of the rail compared to the CNCRouterParts variant and flat bar: