Having settled on some Igaging linear scales and Yuriy Krushelnytskiy’s DIY DRO for Android as mentioned in my Mini Mill posting I set about making the board itself a cheaper prospect.
I am not a big fan of the Arduino boards and their associated shields, as they use a non-standard pin spacing from one side to the other, which is incompatible with 0.1″ perfboard or stripboard, simply so distributors can charge a premium for the boards and shields, many of which do not contain more than a few pennies worth of components.
I can understand the convenience factor and the “plug and play” nature of the shields, however personally I am not willing to pay the premium for them. I would rather spend a little more time on a breadboard or with Eagle designing a more minimalist solution that only uses the components actually required.
At least the Launchpad platform from Texas Instruments is almost compatible with standard 0.1″ perfboard (it does fit, but the pins will be at a little bit of an angle).
Both solutions proposed by Yuriy make use of a 20 pin chip – ATmega328P on the Arduino Uno/Duemilanove/whatever and a MSP430G2553 for the Launchpad, now considering that only 5 I/O pins are actually being used (6 if you connect RX and TX from the bluetooth module), this is a little overkill.
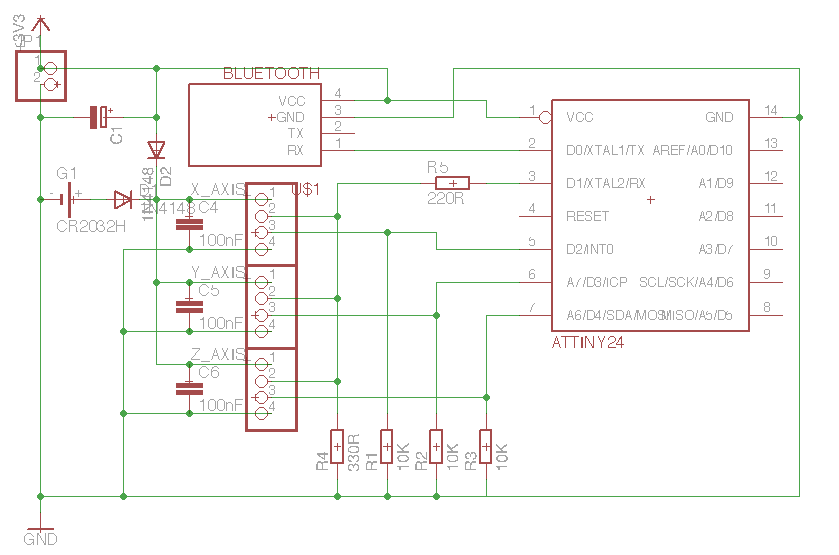
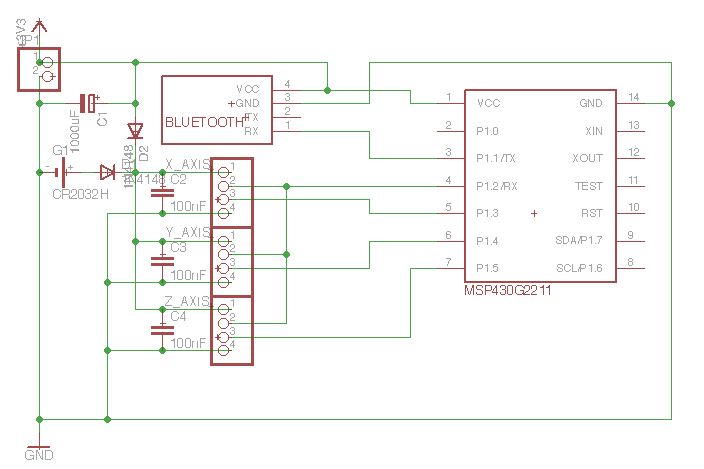
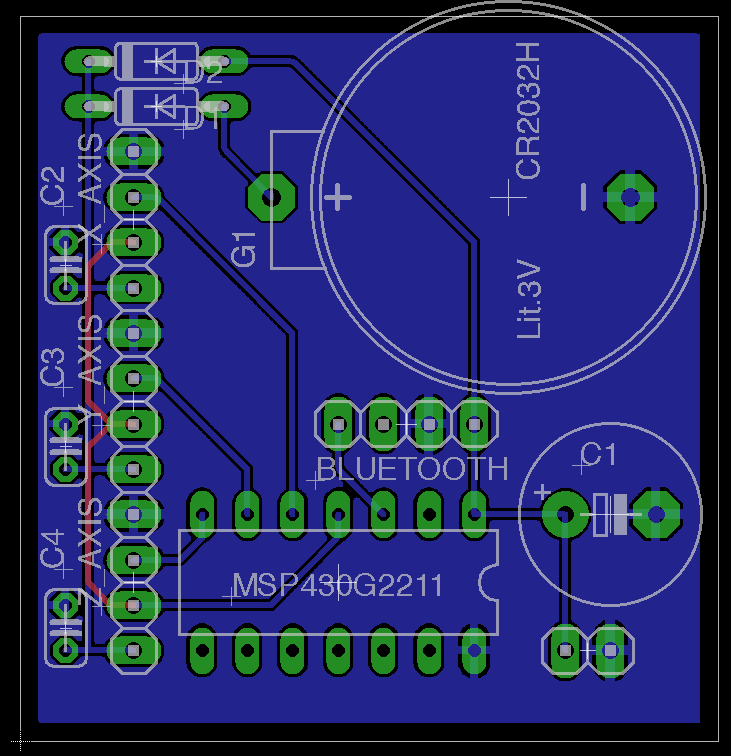
A better choice of chips would be the 14 pin ATtiny24/44/84 from Atmel or the MSP430G2231/MSP430G2211 from Texas Instruments, you are still wasting half the I/O pins, but going smaller still does not really have enough pins.
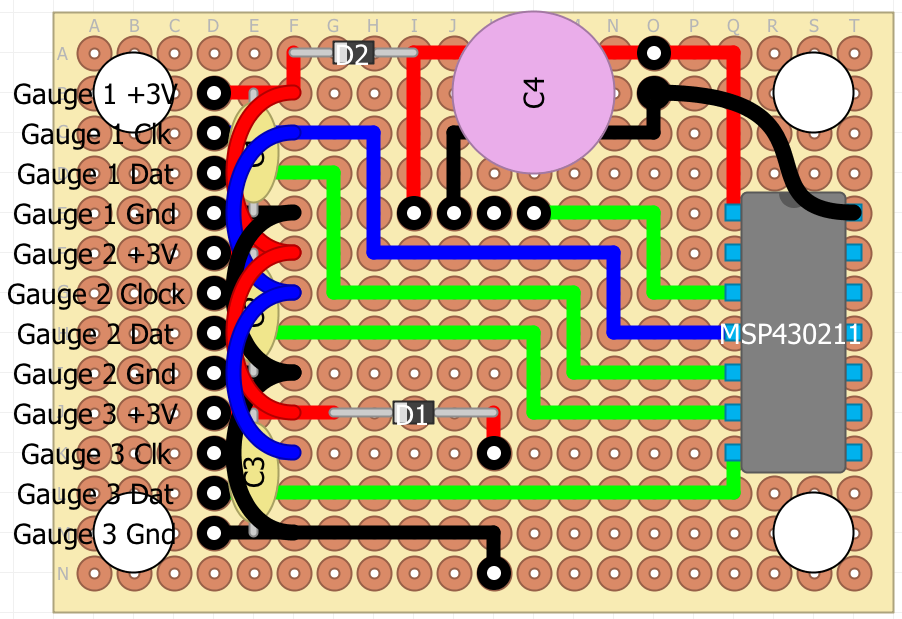
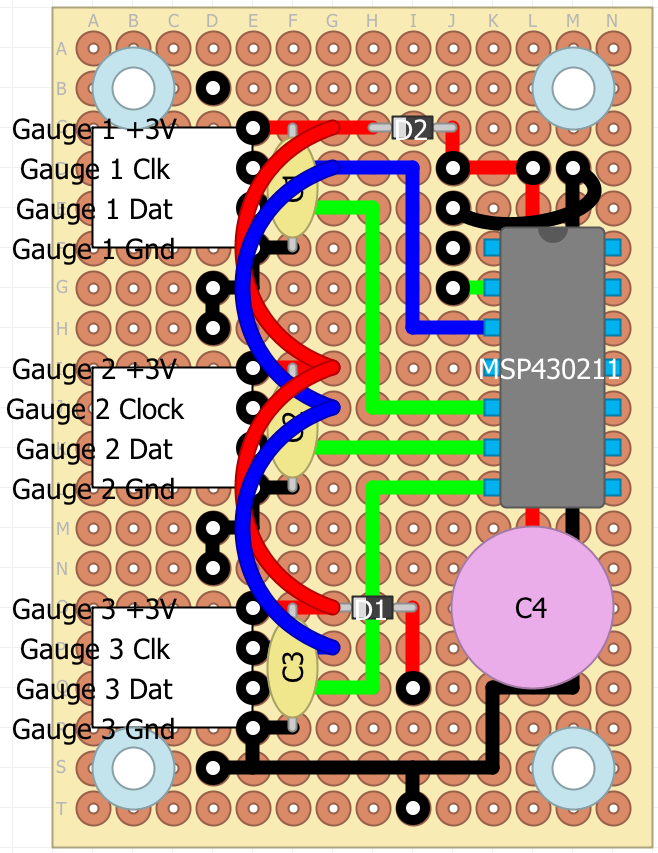
I have chosen to draw up the circuits with the additional battery, diodes and smoothing capacitor as mentioned in one of Yuriy’s other posts.
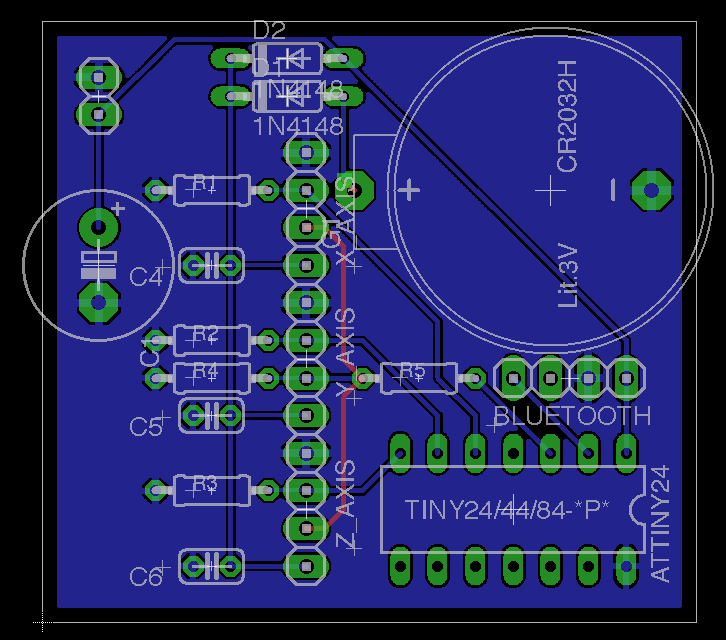
ATtiny version: